AT 319 Week 12 - Calculating Impervious Surfaces: Object Based Classification Tutorial
In this weeks lab, I created a tutorial for object based classification. This tutorial is specific to the Louisville Neighborhood area in the “Surface Imperviousness” project.


Once your raster is set up, open the Image Classification Wizard and configure it with the following settings.
Page 1 of the wizard deals with the configuration settings. Desired settings are shown in Figure 3:

Once set, click Next.
Note: Supervised and unsupervised denotes the user-input of classification. For supervised, the user deliberately chooses areas that will be used as training samples. Unsupervised uses a computer algorithm to do this process.
Page 2 of the wizard deals with segmentation settings. The desired settings are shown in Figure 4. Once these parameters are set, click Next.

The segmentation settings are described by ESRI.
Spectral Detail:
The Spectral detail parameter sets the level of importance given to spectral differences between pixels on a scale of 1 to 20. A higher value means that pixels must be more similar to be grouped together, creating a higher number of segments. A lower value creates fewer segments. Because you want to distinguish between pervious and impervious surfaces (which generally have very different spectral signatures), you chose a lower value.
Spatial Detail:
The Spatial detail parameter sets the level of importance given to the proximity between pixels on a scale of 1 to 20. A higher value means that pixels must be closer to each other to be grouped together, creating a higher number of segments. A lower value creates fewer segments that are more uniform throughout the image. You chose a low value because not all similar features in your imagery are clustered together. For example, houses and roads are not always close together and are located throughout the full image extent.
Minimum Segment Size in Pixels:
Unlike the other parameters, the Minimum segment size in pixels parameter is not on a scale of 1 to 20 and can take any value. Segments with fewer pixels than the value specified in this parameter will be merged into a neighboring segment. You don't want segments that are too small, but you also don't want to merge pervious and impervious segments into one segment. The default value is acceptable in this case.
ArcGIS will now display a preview of the segments (Figure 5).
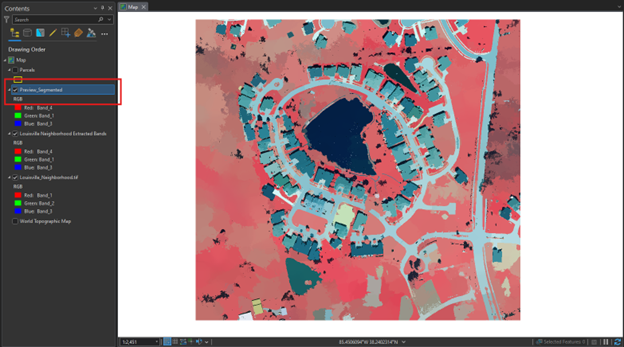
Because this is a preview, the level of detail that it displays depends on the extent (how zoomed in/out) of the raster. Zooming in will show greater detail. This allows you to examine the segmentation without having to fully render and restart the process each time you need to make changes, which can be time consuming.
Page 3 of the wizard allows you to determine the training samples. At first, it provides its own classifications (Figure 6):

Remove all of these, as we will be creating our own classes. Right click on a class and select “Remove Class” to remove it.
Right-click NLCD2011 and choose Add New Class.
This will open the Add New Class page, set the following parameters (Figure 7):

According to ESRI, “The value 20 is the number that will be attributed to all segments identified as impervious through the classification process. It is more of a numeric label and is not intended to be used in any calculations.”
Create another new class with the following parameters (Figure 8):

Next, we will create subclasses for the Impervious and Pervious classes.
Right-click the Impervious parent class and choose Add New Class. Add a class named Gray Roofs with a value of 21 and a color of Gray 50% (Figure 9).

Then, you want to create a training sample. Use the polygon tool to select an area on a roof, making sure to exclusively include roof material (Figure 10).

Repeat this with other roofs until you have 6 or 7 samples.
Under the “Impervious” parent class, create 2 more subclasses with the following parameters.
Subclass | Value | Color |
Roads | 22 | Cordovan Brown |
Driveways | 23 | Nubuck Tan |
Under the “Pervious” parent class, create 5 subclasses with the following parameters.
Subclass | Value | Color |
Bare Earth | 41 | Medium Yellow |
Grass | 42 | Medium Apple |
Trees | 43 | Leaf Green |
Water | 44 | Cretan Blue |
Shadows | 45 | Sahara Sand |
Create 6 or 7 training samples for each class. The end result should look something like Figure 11:

Once the samples are collected, press Next.
This will bring you to page 4. Set the following preferences as seen in Figure 12.

Leave any other parameters unchanged and click Run.
The output should look like Figure 13, with each color corresponding to the classes you created.
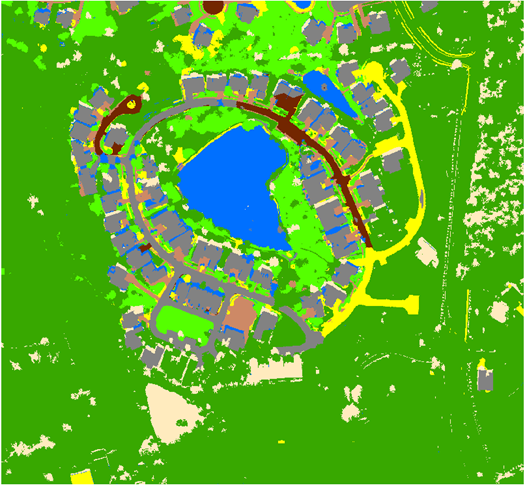
Click Next in the Image Classification Wizard. This will bring you to the “Classify” page. Name the output to “Classified_Louisville” and click run.

The fully rendered raster will look something like Figure 15. Notice an increased level of detail.

Click Next in the Image Classification Wizard. This will bring you to the “Merge Classes” page. For each class, select it’s corresponding parent class in the “New Class” column (Figure 16).

You should see a preview that looks likes Figure 17. Click Next.

The next page on the Image Classification wizard is the “Reclassifier” page, allowing you to rectify minor errors. In this case, we need to reclassify an area at the south of the map from Impervious to Pervious (Figure 18).
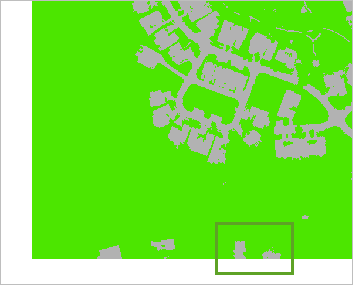
In the wizard, select “Reclassify within a region” and set the new class as “Pervious”. Draw a polygon around the area of interest and click “Run.” This will reclassify the area and leave an end result that looks like Figure 19.

The end result can be seen in figure 20.


Comments